How to add or edit a PDF’s table of contents
A PDF’s table of contents, also called its bookmarks or outline, is the clickable list in a PDF app’s sidebar. Scans and many exports have none, and merged files often end up with clumsy ones. Sheafly lets you add, rename, reorder, indent and remove entries on a Mac, iPhone, or iPad, and can print the result as a linked contents page at the front of the file. It works on a single PDF as well as a merge.
Quick answer
- Open the PDF in Sheafly. One file is enough.
- Open the editor: Inspector › Edit TOC on Mac, Edit TOC in the iPad inspector, or Table of Contents on iPhone.
- Use + to add an entry (a title and a page), − to remove one, and Indent / Outdent to nest them (⌘] / ⌘[ on Mac).
- Optionally turn on Settings › General › Add a Table of Contents page, before or after editing. Then choose Save Merged PDF.
Add bookmarks to a PDF that has none (Mac)
Our example is a six-page Seed Library Catalog with a section per plant family and no bookmarks at all.
- Open the PDF in Sheafly and choose Inspector › Edit TOC. Even a PDF without bookmarks gets one top-level entry named after the document.
- Add an entry. Select the row it should follow and click +. Type a title and set the page. Pages are counted in the finished file, and the sheet shows the total. Then click Add. The entry links to the top of that page.
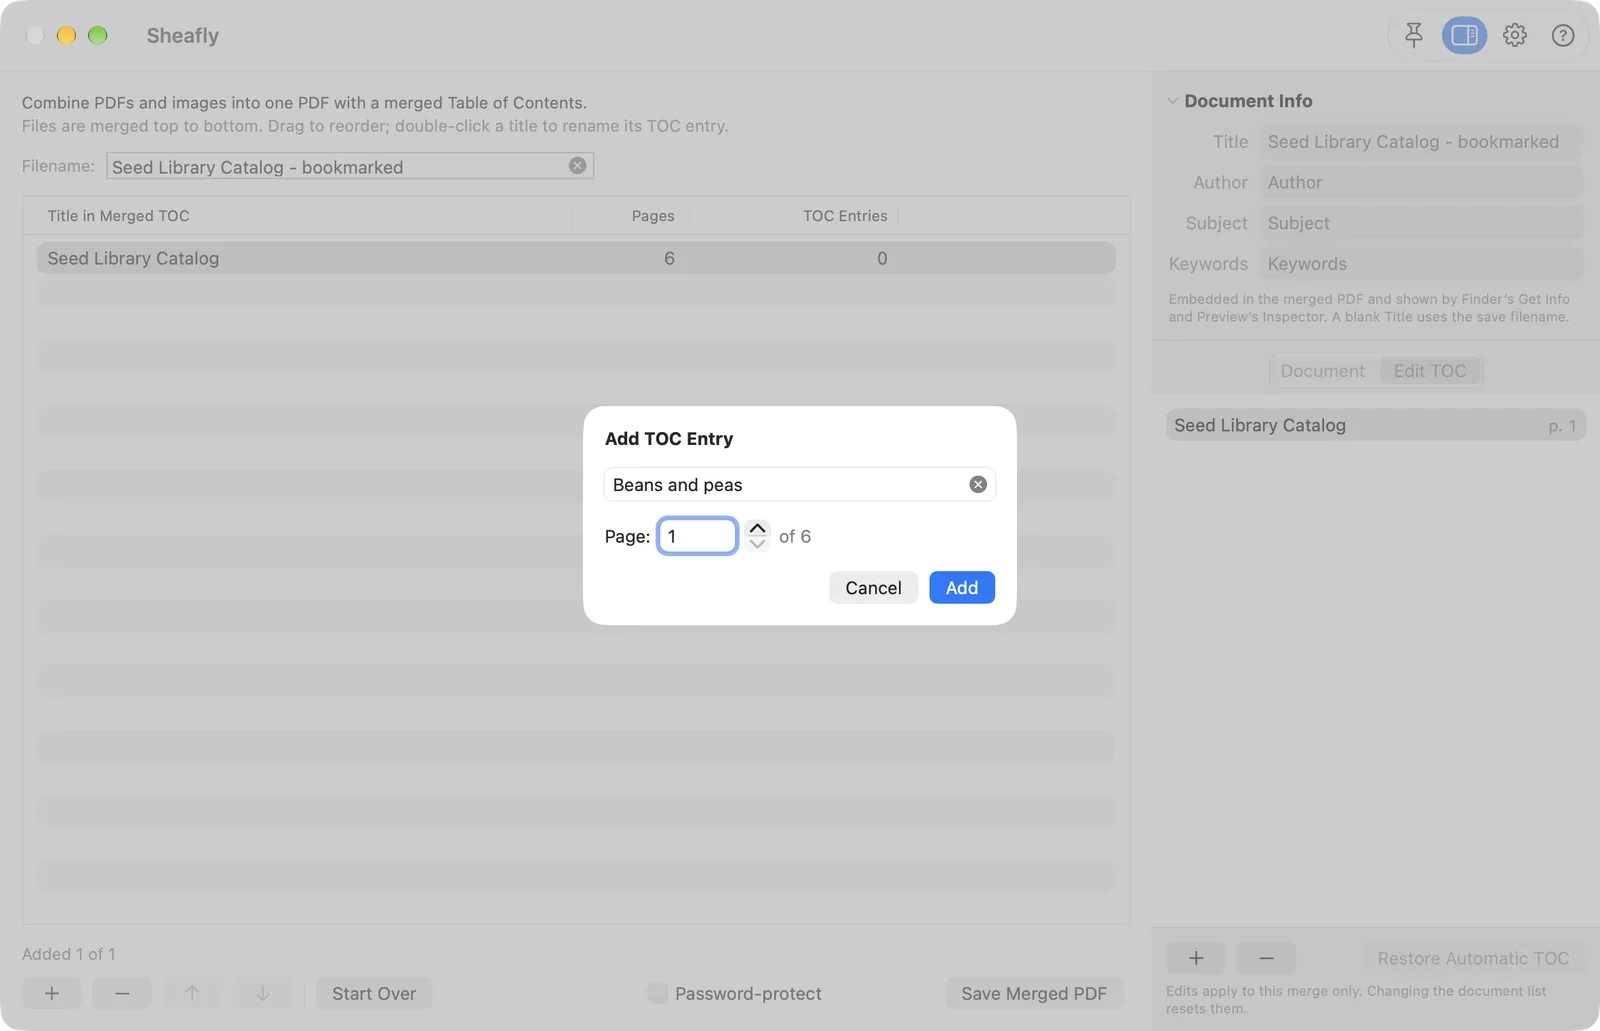
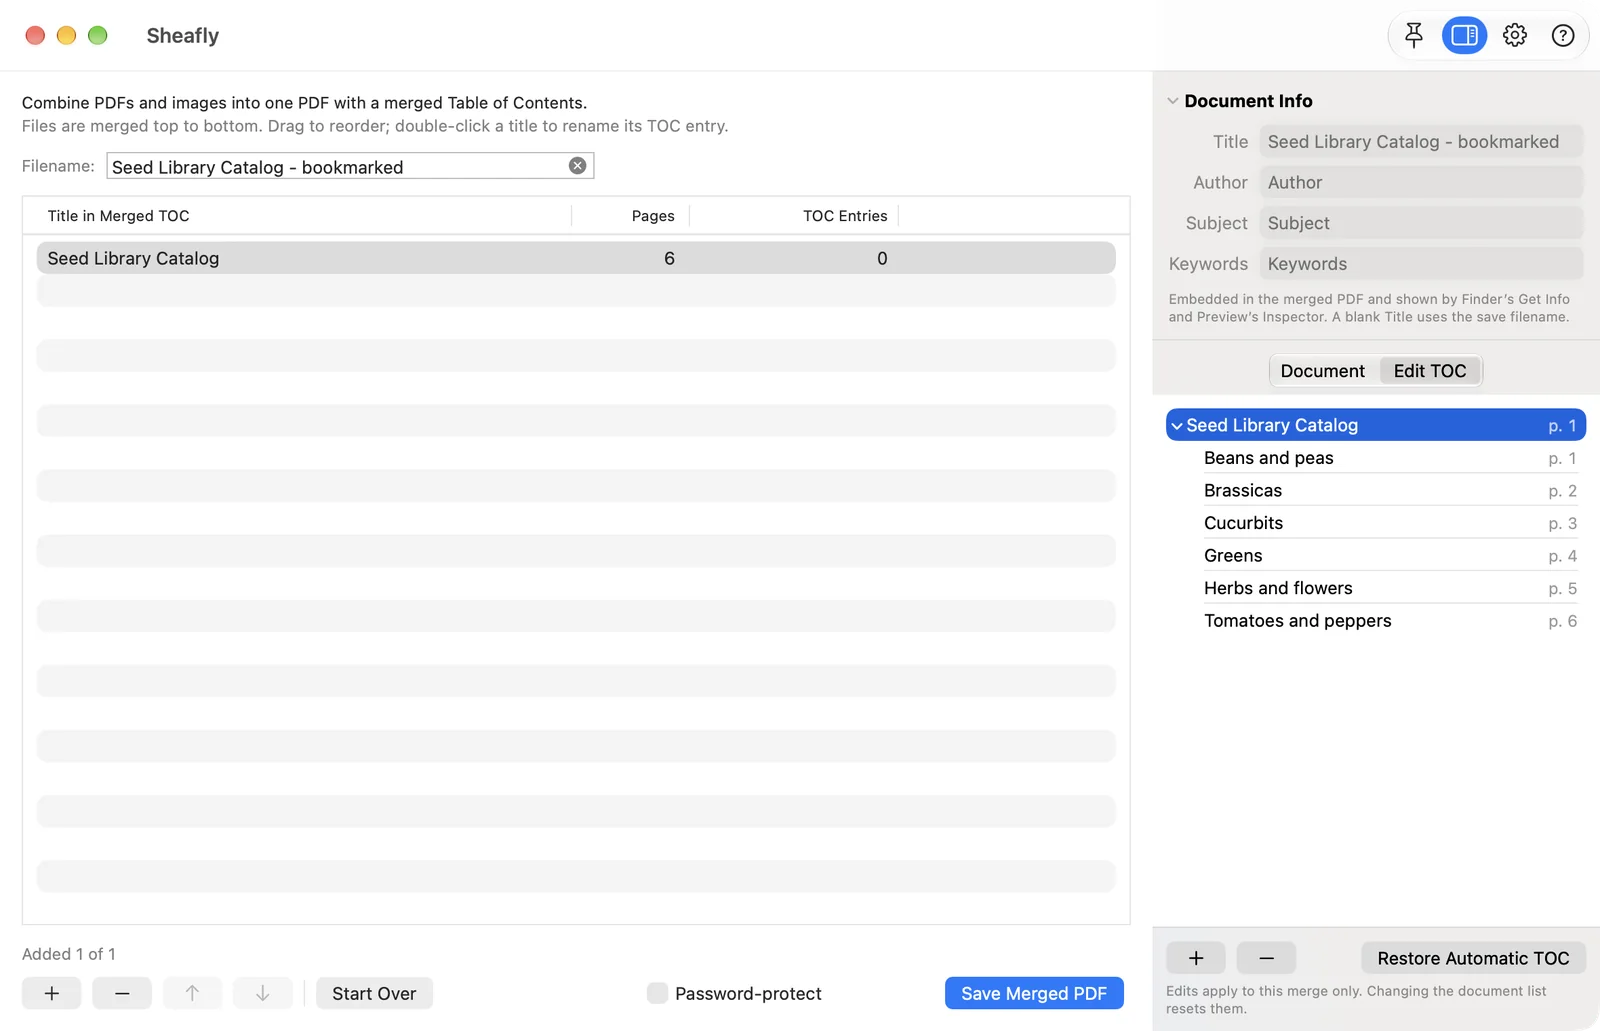
- Nest the entries. Select an entry and press ⌘] to indent it under the entry above, or ⌘[ to outdent. Right-click an entry for Rename, Add Entry After, Indent, Outdent, and Remove.
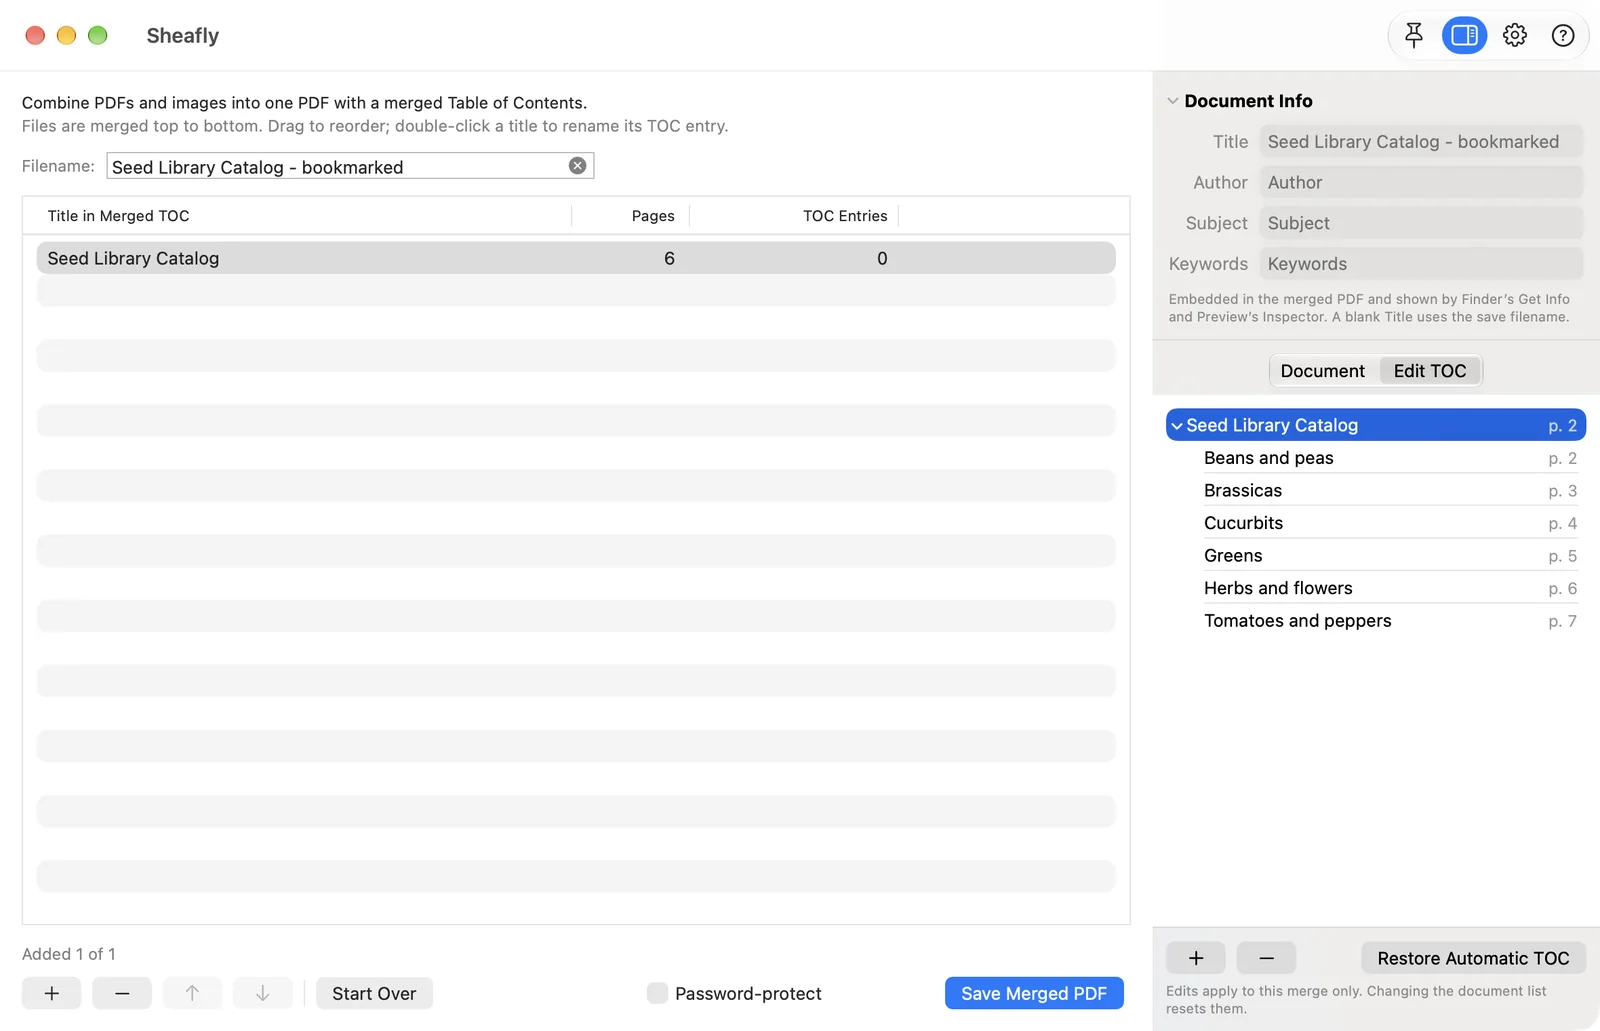
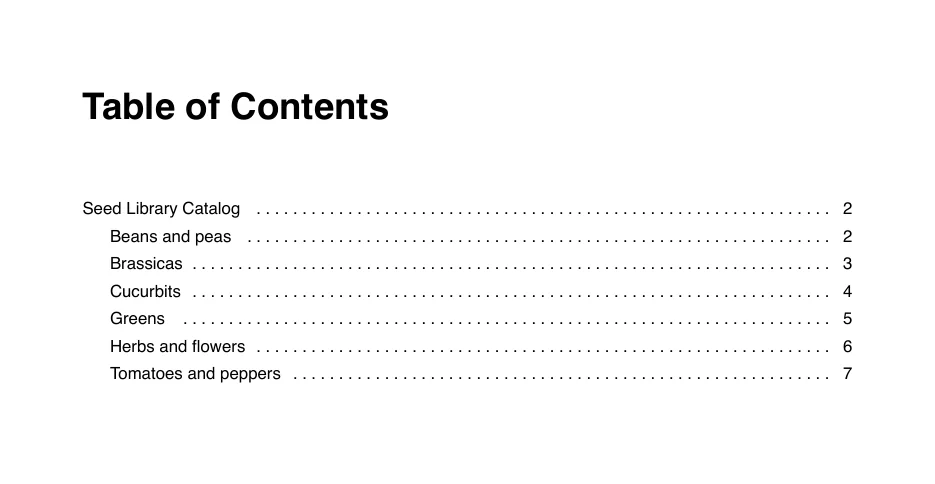
- Optional: add a printed contents page. Turn on Settings › General › Add a Table of Contents page. It goes in front of page 1, so every page moves back by one. The entries you added move with their pages.
- Save with Save Merged PDF.
Clean up bookmarks after a merge
When we merged four handbook chapters (see how to merge PDFs and keep bookmarks), each chapter’s own outline began with an entry repeating the chapter title, so the combined outline read 1. Welcome and Orientation › Welcome and Orientation › About the garden. Two clicks per chapter fixed it:
- Select the duplicate entry in Edit TOC.
- Click − (or press Delete). The entry goes, and its sub-entries move up one level, so nothing below it is lost.
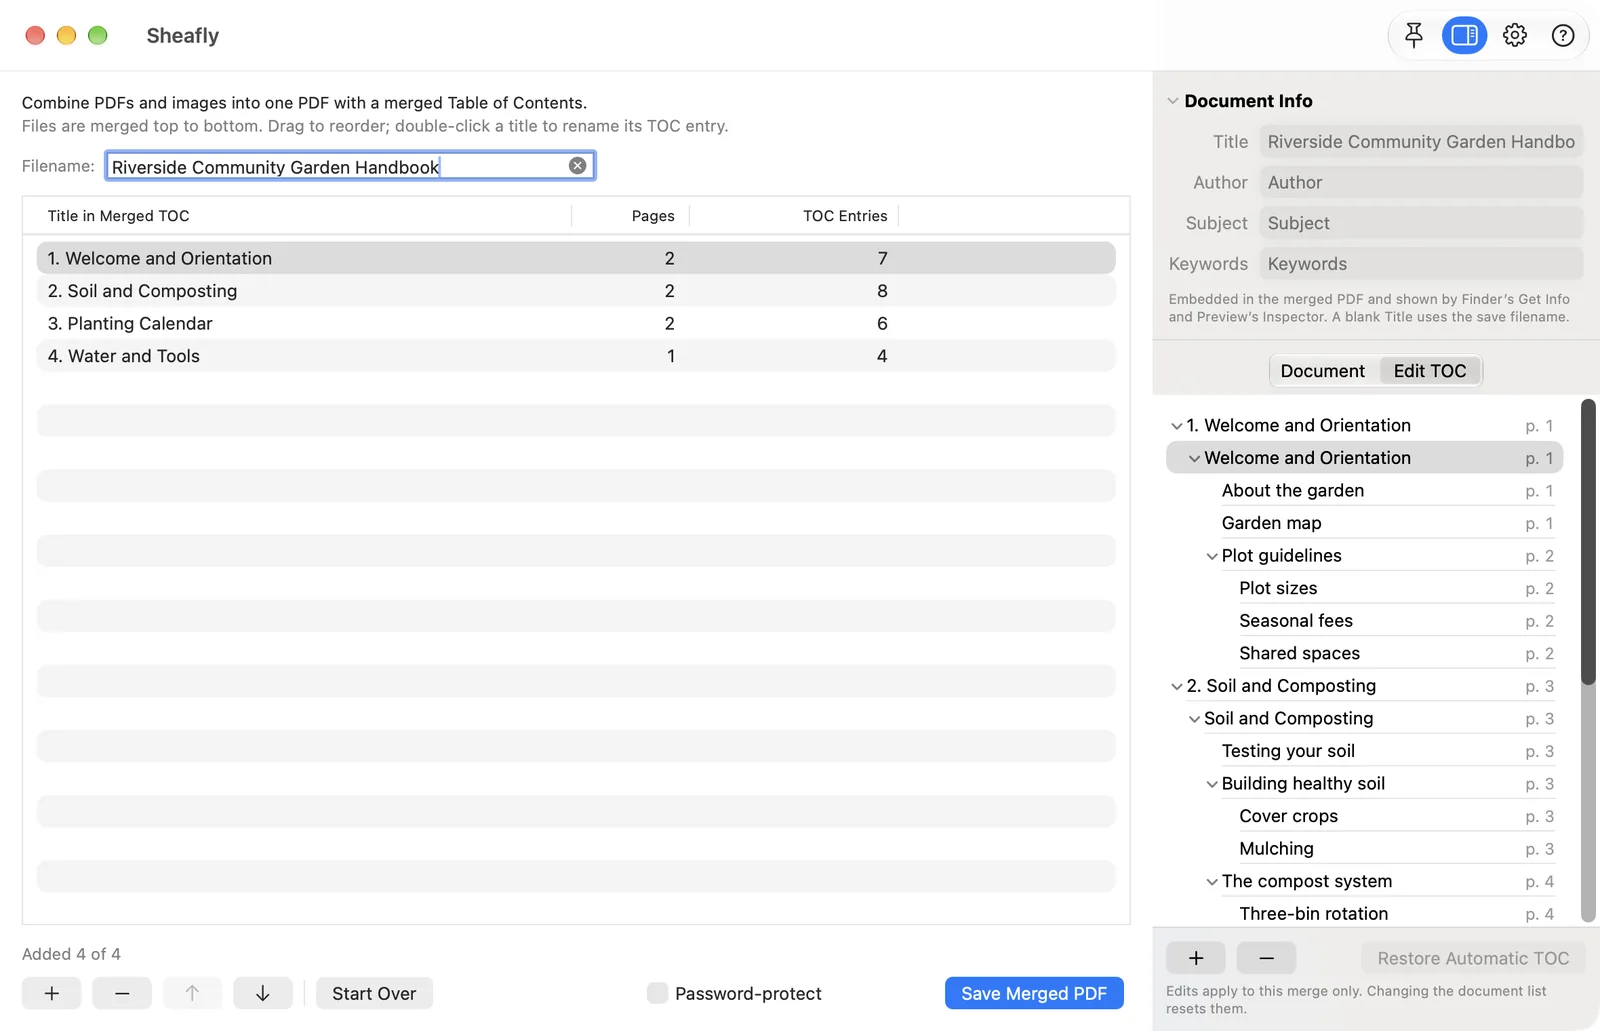
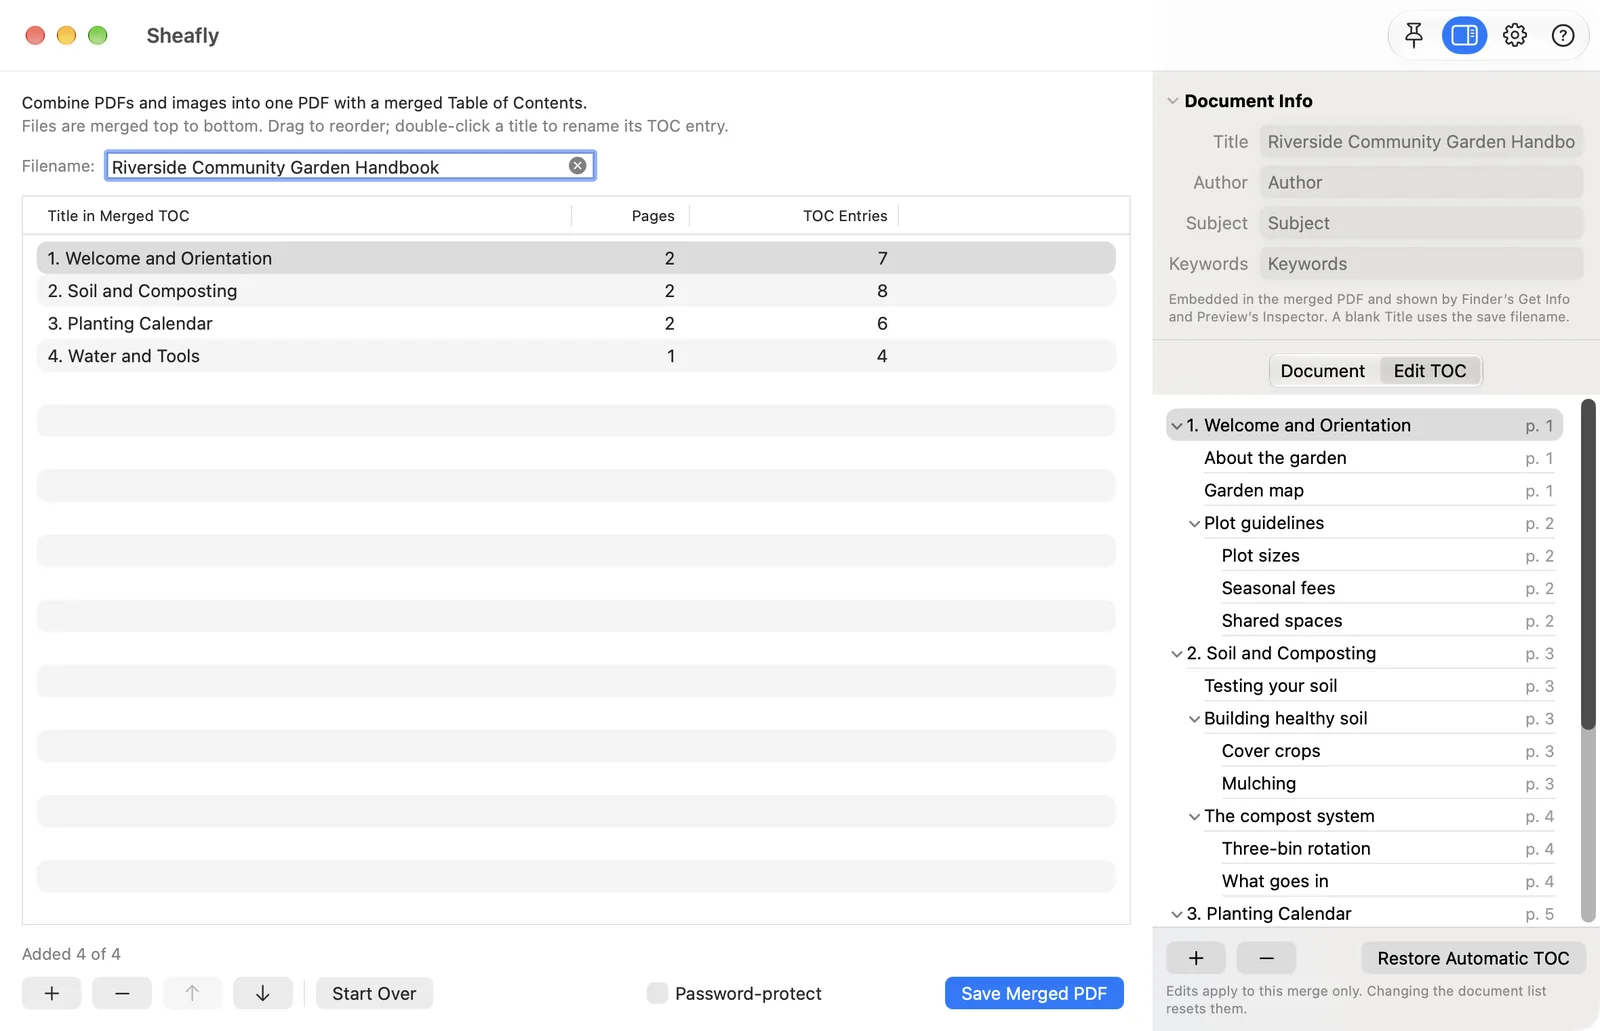
To rename an entry, select it and press Return. To rename a whole document’s top-level entry, double-click its title in the document list. Restore Automatic TOC throws away every edit and starts again. If you’d rather not get the automatic entries at all, turn off Add a top-level entry for each document or Carry over each document’s own entries in Settings › General.
Change settings without losing your edits
You don’t have to settle every option before you start editing. After cleaning up the handbook, we turned on the Table of Contents page, Flatten into the page, and page-number footers. Every edit stayed. The page numbers moved by one to make room for the new contents page.
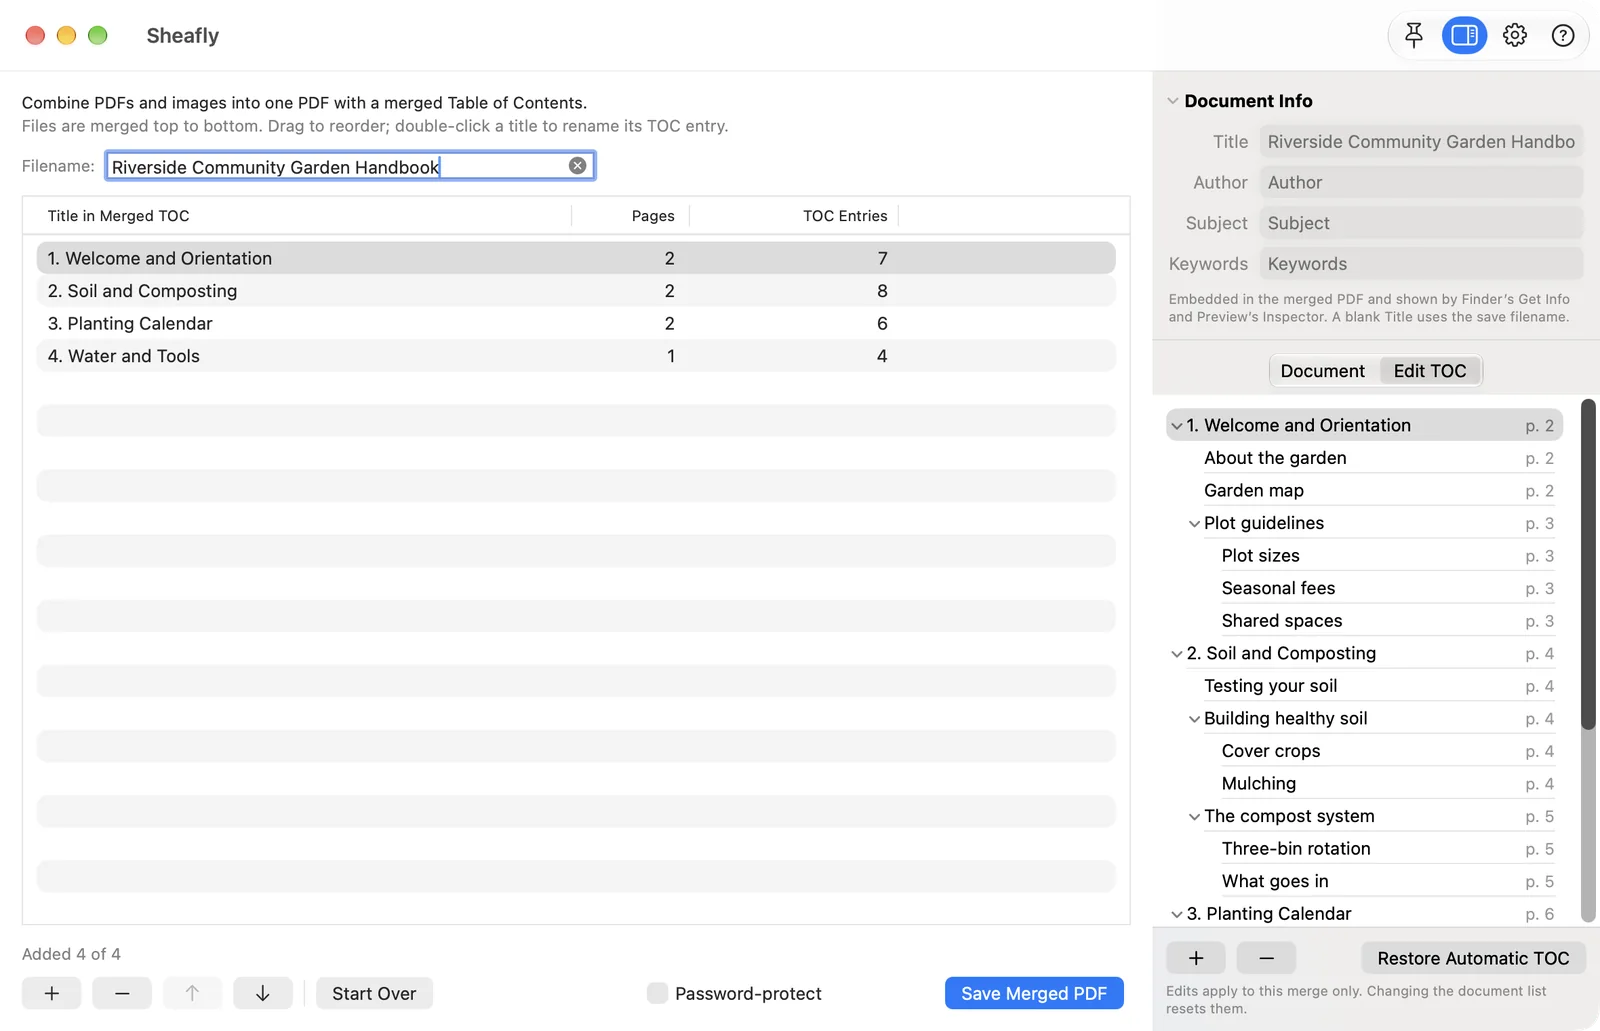
- Entries a setting hides come back as you left them. Turn off Carry over each document’s own entries and on again, and your renames and removals are still there.
- Removed entries stay removed, and entries you added keep pointing at the same page of your document.
- What does start afresh: adding, removing, or reordering documents, or choosing different pages. Restore Automatic TOC also discards your edits on purpose.
Edit bookmarks on iPhone or iPad
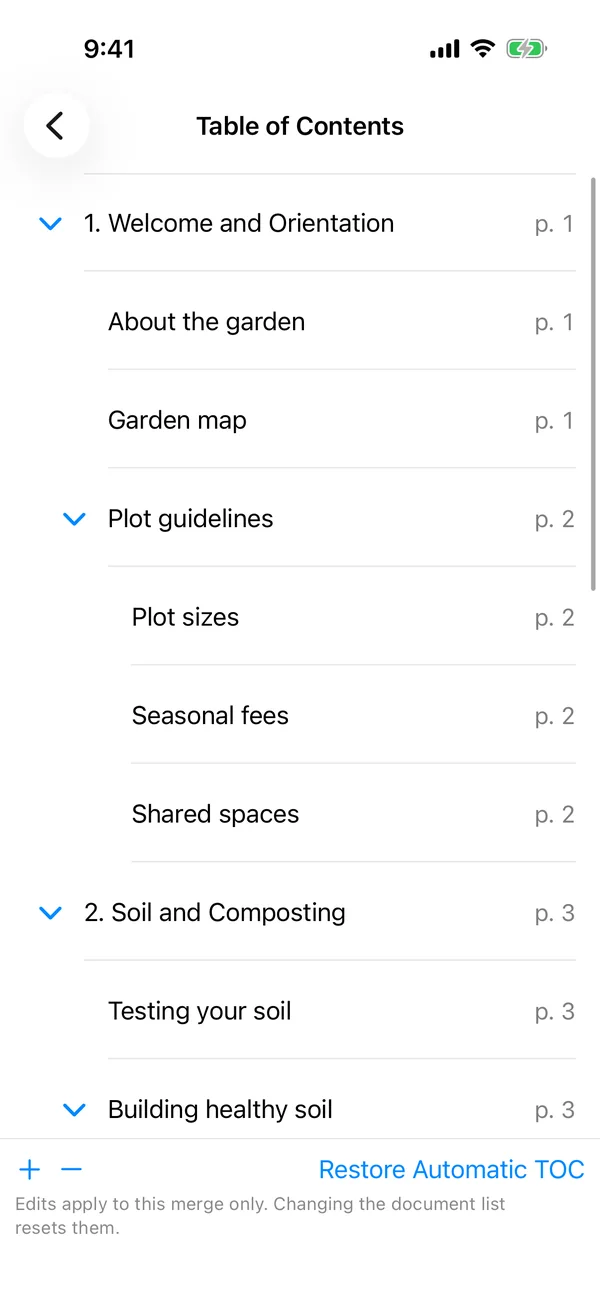
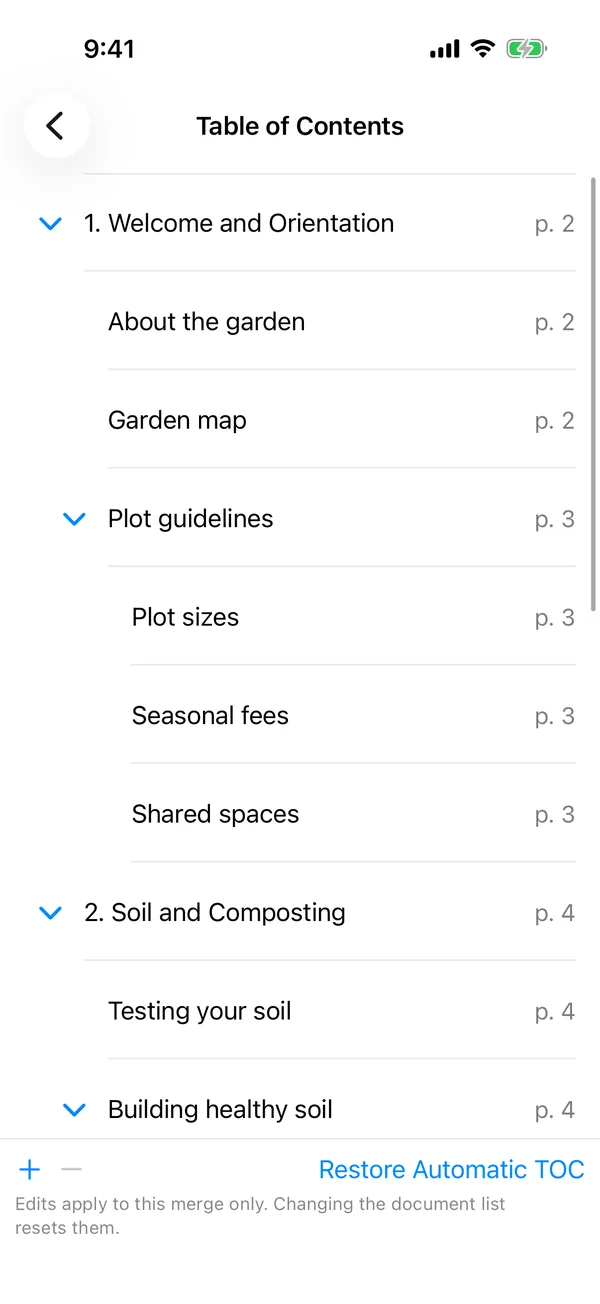
On iPhone, tap Table of Contents under Merged PDF. It’s the same editor: tap an entry to select it, use + and − at the bottom, and touch and hold an entry for Rename, Add Entry After, Indent, Outdent, and Remove. Tapping a document and then TOC Entries shows just that document’s part of the outline.
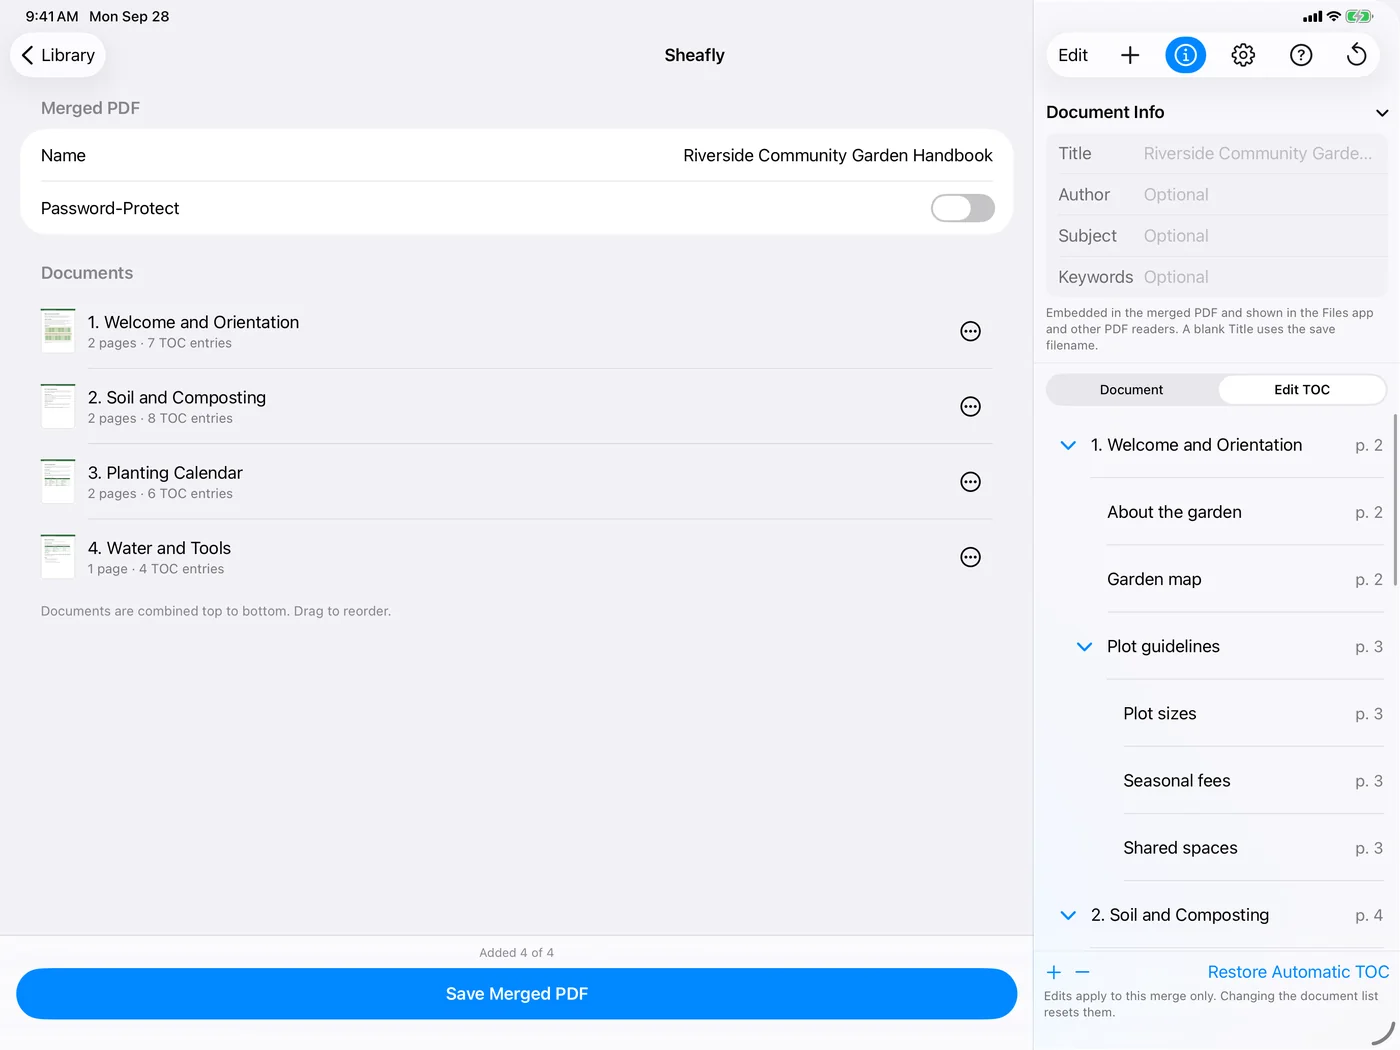
On iPad, the editor is the Edit TOC tab of the inspector column, right beside the document list.
Split a PDF by its table of contents
Bookmarks work in the other direction too. File › Split PDF by TOC on Mac, or Document Actions › Split PDF by TOC on iPhone and iPad, turns one PDF into a separate PDF for each top-level entry (plus a Front Matter file for any pages before the first entry), and each chapter keeps its nested bookmarks.
Limits
- Hand-added entries open the top of a page. They can’t point to a spot halfway down a page. Bookmarks carried over from a source file keep their exact position.
- Edits belong to this set of documents. They survive changes in Settings, but changing which documents or pages are combined resets them. To come back later, save the whole setup as a session with File › Save Session on Mac. On iPhone and iPad, in-progress sessions are kept in the library. Saved sessions remember your edits too.
- Sheafly edits the outline, not the page text. The printed contents page is generated for you, but it isn’t a full PDF text editor.

Try it on your own files
Sheafly is a one-time purchase on the App Store, and one purchase covers Mac, iPhone, and iPad. No subscription, no account, and your documents never leave your device.

Requires macOS 14 or later, or iOS/iPadOS 17 or later.
More Sheafly guides
- How to merge PDFs and keep their bookmarksCombine chapter files into one PDF with every bookmark still linked to the right page.
- How to make a scanned PDF searchable without uploading itOn-device OCR adds invisible, searchable text to image-only scans.
- How to watermark and password-protect a PDFStamp Draft or Confidential on every page, then encrypt and restrict the file.
- How to combine images and PDFs into one PDF, with page numbersPhotos, screenshots and PDFs in one file, in your order, numbered continuously.